Open Agriculture Foundation

OpenAg informational website
Upgrading your PFC1 Hardware to use openag_brain with Docker
If you own a Personal Food Computer version 1 (PFC1) and are interested in upgrading to use the new software for PFC2 using fixtures and Docker these step-by-step instructions will teach you how to get started.
The PFC2 software is powered by Robot Operating System (ROS) and is extremely powerful for hacking new sensors and actuators. It requires each sensor or actuator (i.e. temperature sensor or fan) to be set up as a fixture and to include a firmware module. We’ll go into that more in a second. First you need to set up your new Raspberry Pi 3 with the new software. You’ll find the steps to do that here.
Installing default fixtures
Openag_brain uses “fixtures” to define ROS topics in the system. Now that you have a freshly installed and running brain, let’s install the default fixtures.
Start by taking a look at your CouchDB database running on your Raspberry Pi. Open a web browser and paste the following URL.
http://<raspberrypi_IP_address>:5984/_utils/index.html
Replace <raspberrypi_IP_address> with the IP address or url (raspberrypi.local?) of your Pi. You will see something like this:

The important thing to note is the number of documents in each section.
Now let’s load the default fixtures that come with openag_brain. Tunnel back into your docker container:
docker exec -it openagbraindockerrpi_brain_1 bash
Make sure your workspace is set up:
source catkin_ws/devel/setup.bash
This command will install the default fixtures:
openag db load_fixture ~/catkin_ws/src/openag_brain/fixtures/default.json
Now hit refresh on the web browser displaying your CouchDB view. You should see a bunch of documents have been installed and it now looks like this:

Next we’ll load the firmware module for the DHT22 the Grove Humidity and Temperature Sensor that came in the PFC1 BOM.
Click on the firmware_module_type link in the CouchDB and you will see a list of the sensor definitions available for use. Most of these sensors are from the PFC2 BOM but you will also see the DHT22. Click on that record and see the JSON entry defining that sensor type.
Next go back to the database Overview page and click “firmware_modules.” In this section we define our specific sensor implementation. Click “New Document” and then select the Source tab
Delete all of the text in the field and paste this into the field:
  {
     "_id": "dht22_1",
     "type": "dht22",
     "environment": "environment_1",
     "arguments": [
         2 //CHANGE THIS TO THE DIGITAL PIN FOR YOUR DHT22 AND REMOVE THIS COMMENT
     ],
     "outputs": {
         "air_temperature": {
             "variable": "air_temperature"
         }
     },
     "air_humidity": {
         "variable": "air_humidity"
     }
  }
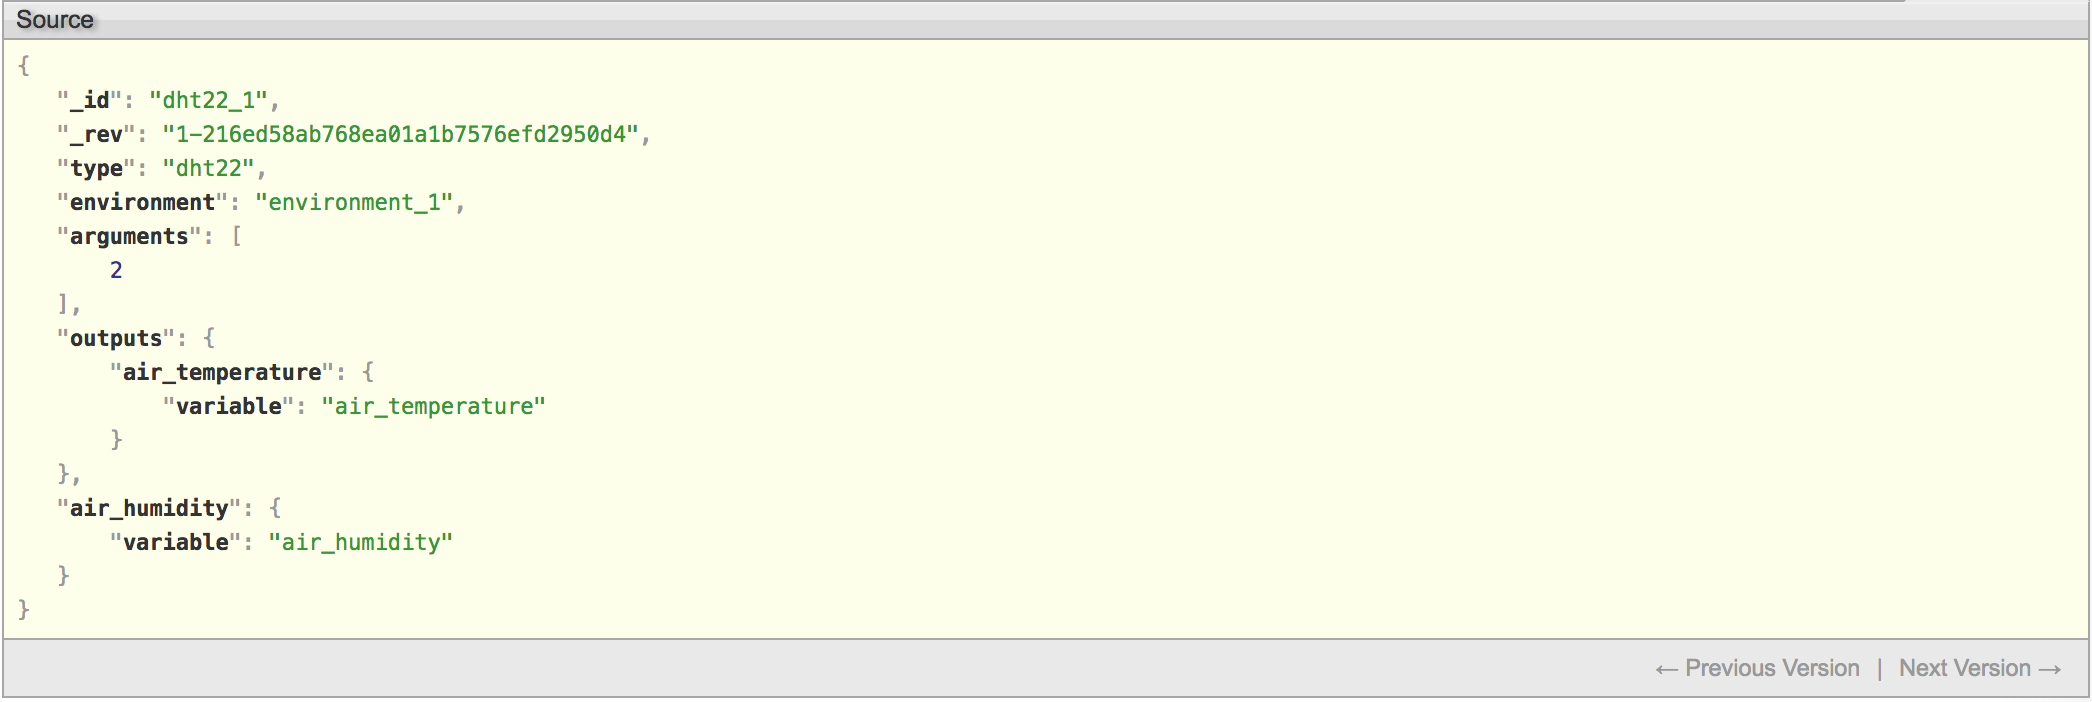
and press “Save Document.” The result should look like this:

Double check the entry by clicking the DHT22_1 link:

The system should have added a _rev (revision) attribute and not changed _id.
To get this entry into the Arduino we’ll need to tunnel into the container again:
docker exec -it openagbraindockerrpi_brain_1 bash
Unplug the Arduino USB connector and place it into another port (or wait 30 seconds and use the same port) and run this command:
rosrun openag_brain flash
Upon the successful completion of the flash we’ll need to exit the container.
exit
From the openag_brain_docker_rpi folder run
docker-compose restart
When the restart is complete tunnel back into the container
docker exec -it openagbraindockerrpi_brain_1 bash
Re-set up the workspace (soon you won’t have to do this but for now is required)
source catkin_ws/devel/setup.bash
Take a look at the list of published ROS topics
rostopic list
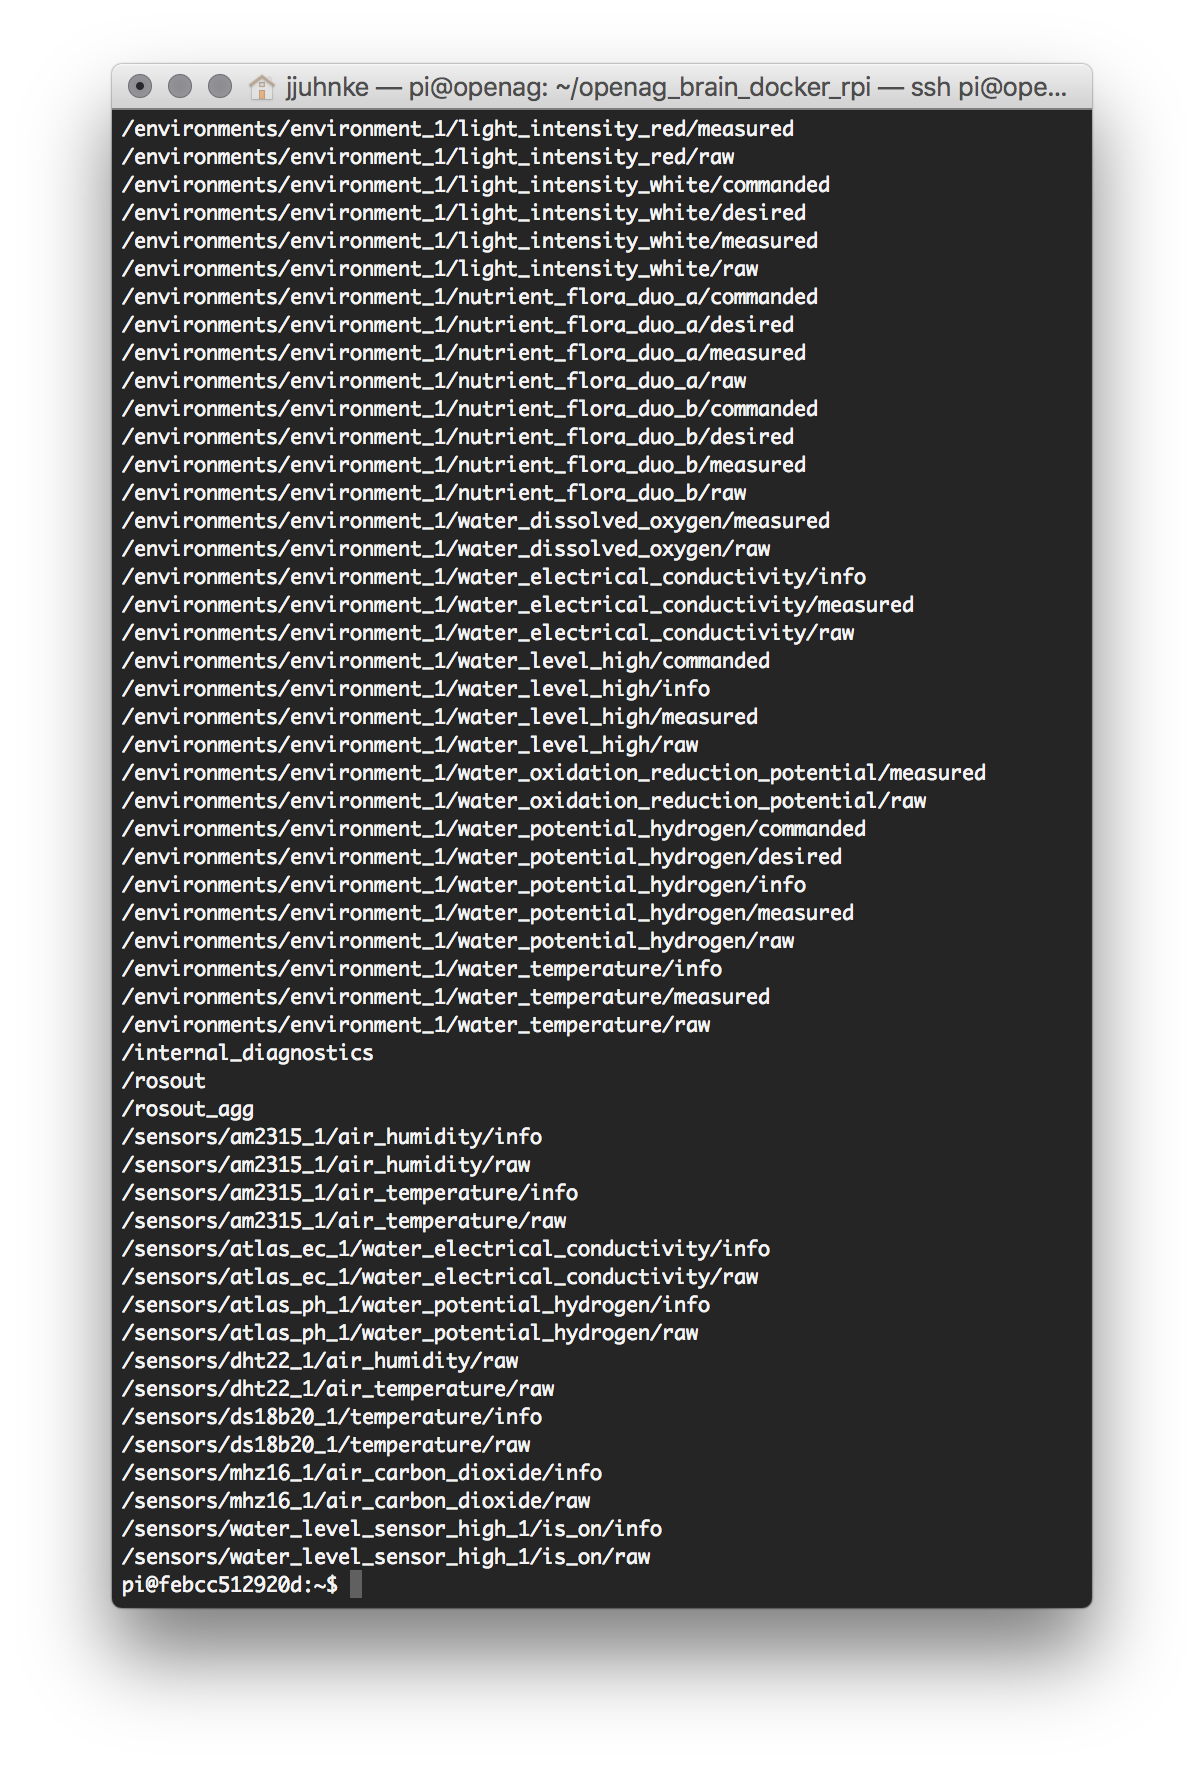
You should get something like this:

Look for the DHT22_1 entry and copy the entire line (humidity or temperature) into your clipboard and checkout the data stream by typing “rostopic echo “ and pasting the string into your terminal.
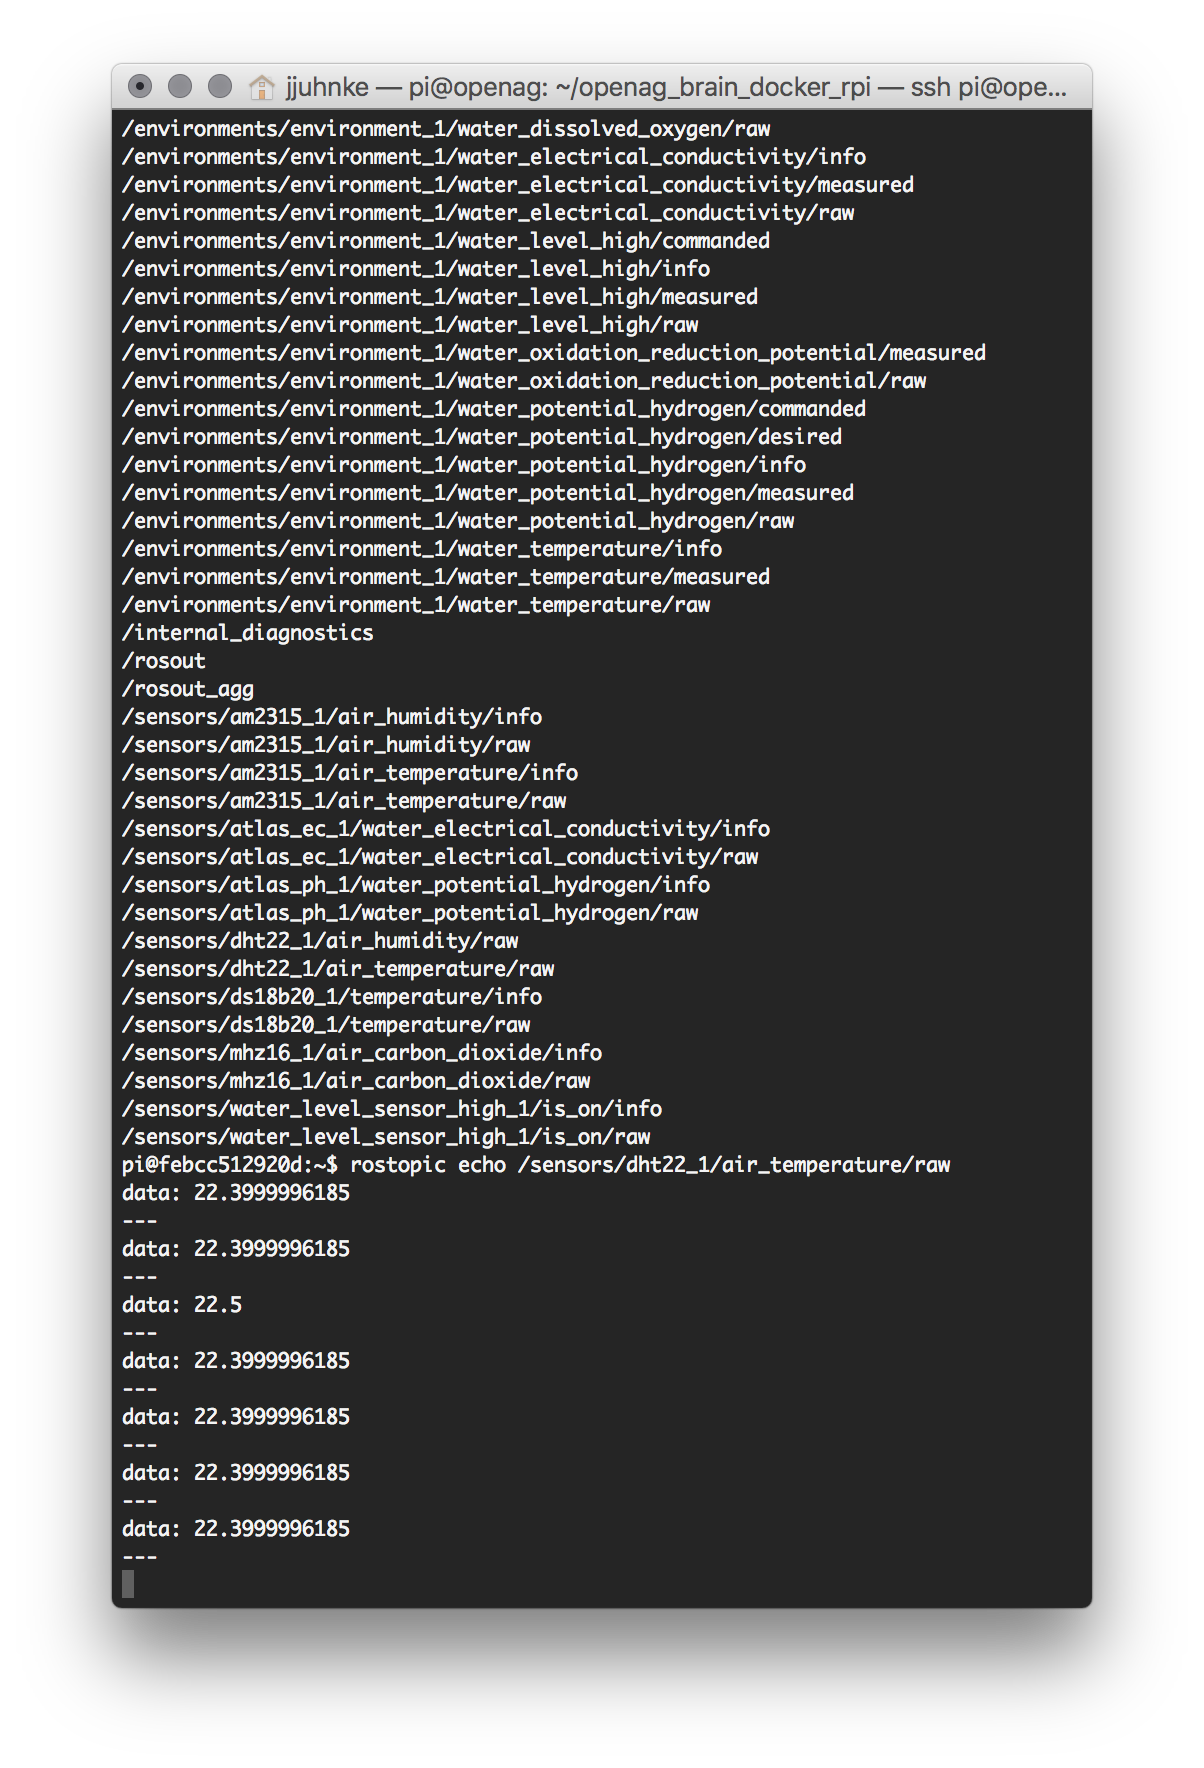
rostopic echo /sensors/dht22_1/air_temperature/raw
You should see your data flowing like this!

Congratulations! You’ve got one sensor up!
We are currently collecting configuration (firmware_modules) for the rest of the sensors and actuators for all of the PFC1 BOM.
COMING SOON!